
Microsoft Azure CLI can be executed in multiple shells. Running in Linux, MacOS and Windows. In this post, we show you how to install it properly so you can get the goodness that comes from the the PSReadline module.
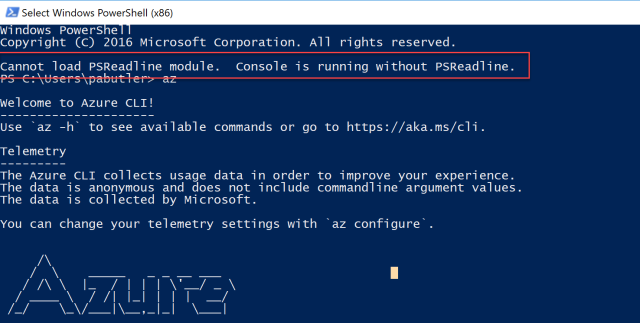
Sometimes when installing the Azure CLI you will get the above error. It is mostly an issue with PowerShell Execution Policy configuration in your computer, and it is quite easy to resolve. These are the steps:
- You will need to setup the proper Execution policy to install the required modules.
- Import the PowershellGet module, this provides the ability to download modules from the http://www.powershellgallery.com/ repository.
- Import the PSReadLine Module, this is needed (not required) by the Azure CLI 2.0 to provide a better console experience. You can read more about it here.
- Install the Azure 2.0 CLI for Powershell.
- (optional) Revert your PowerShell Execution Policy.
Lets get to it:
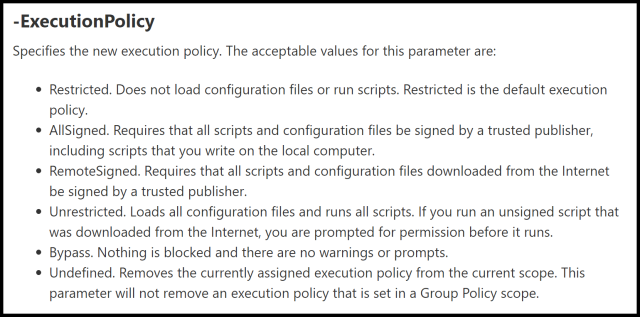
Step 1: Setting the PowerShell Execution Policy.
Check your Powershell Execution Policy, and marked down:
Get-ExecutionPolicy
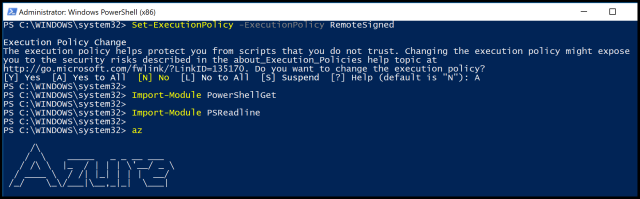
Run PowerShell as an Administrator and change the Execution Policy:
Set-ExecutionPolicy -ExecutionPolicy RemoteSigned
# or you can use Unrestricted
Set-ExecutionPolicy -ExecutionPolicy Unrestricted
Step 2: Import the PowershellGet module:
Execute Import-Module PowerShellGet
Step 3: Import the PSReadline module:
Import-Module PSReadline
Step 4: Install the Azure 2.0 CLI for Powershell:
Step 5: (Optional, but recomended) Restore your PowerShell Execution Policy:
Set-ExecutionPolicy -ExecutionPolicy Restricted


You must be logged in to post a comment.